Drawing a beautiful rose may look complicated — but if you break it down into nine simple steps, it becomes much easier. Follow this guide to create your own elegant rose illustration.
What you will need
A pencil (HB or 2B works well), an eraser, plain paper, and colored pencils or watercolor for the final step. None of it has to be expensive — printer paper and a single graphite pencil are enough to start.
If you want a perfectly proportioned outline to follow, open the rose template in ARTrace and project it onto your paper through the AR camera. You sketch with a real pencil; the reference floats above the page — the same trick botanical illustrators pulled with a 19th-century camera lucida, only without the brass armature. More to trace once you finish? Browse the full drawings-to-trace library for ideas.
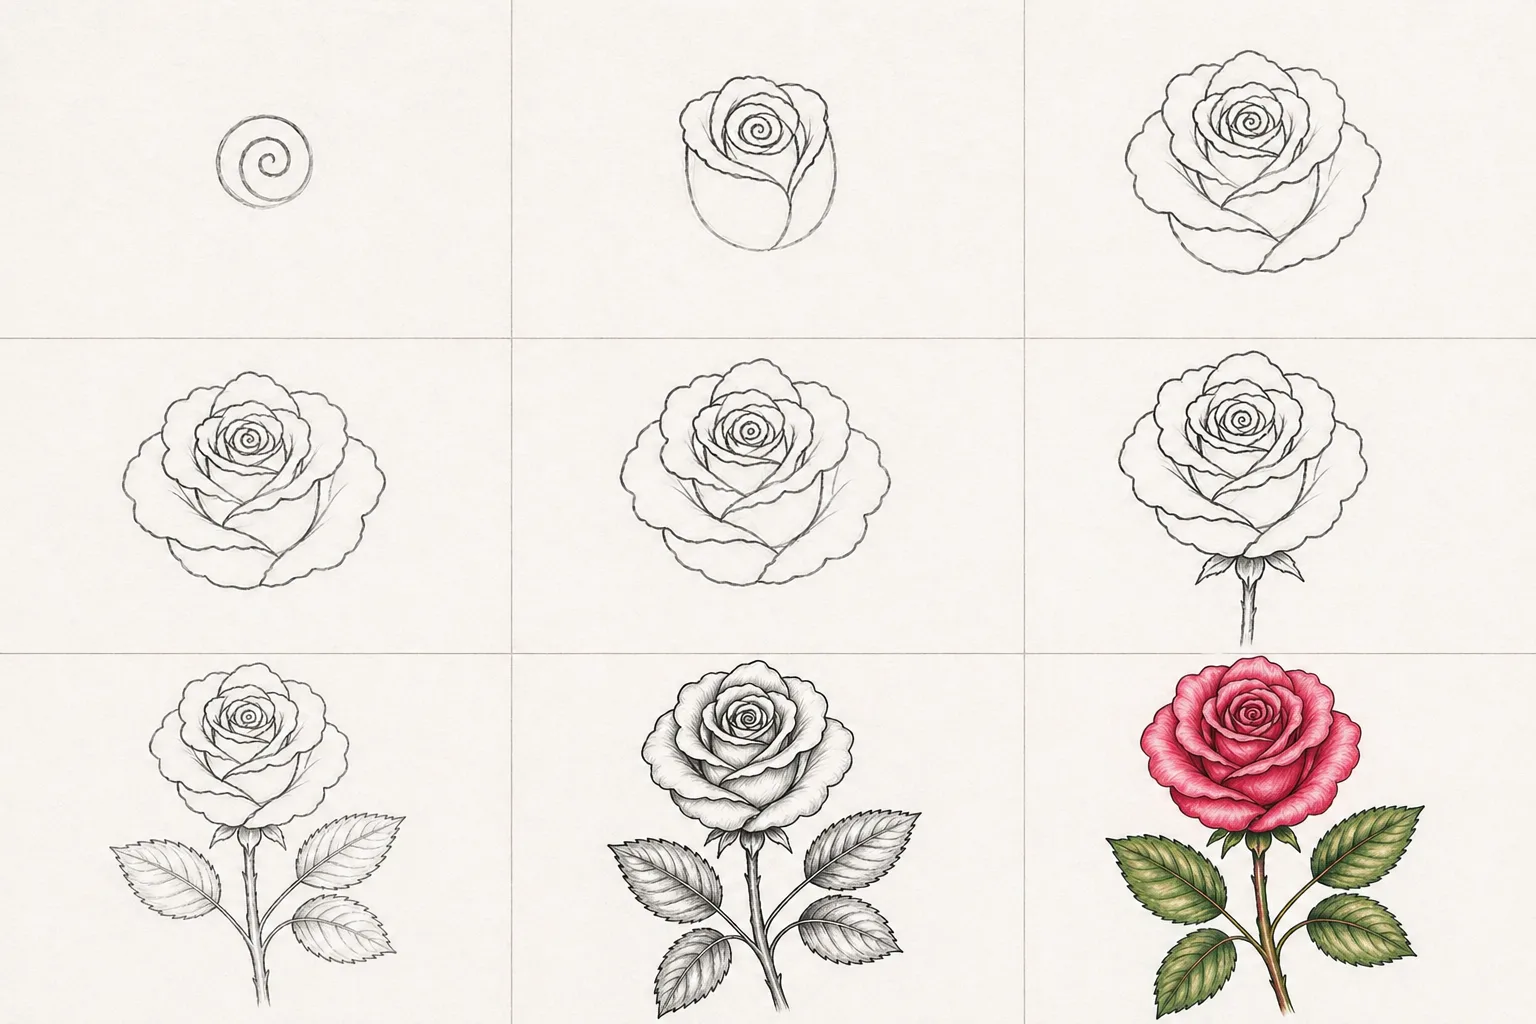
Step 1 · Draw the center
Start with a small, loose spiral about the size of your thumbnail. This will be the heart of your rose and the orientation every petal spirals out from. Don't worry about the spiral being perfect — a rose's center is naturally irregular, and a slightly wobbly line will read as more natural than a clean one.
Press lightly. Everything in this drawing builds on this single mark, but you'll likely refine it as the petals close in around it.
Step 2 · Add the first petals
Draw a few short, curved lines around the spiral to form the inner petals. Keep them tight and slightly overlapping — these petals haven't unfurled yet, so they hug the bud closely.
Aim for three or four small curves, each one wrapping a little further around the center than the last. Think of how a pinwheel folds in on itself.
Vary your petals — real roses are gloriously asymmetrical, and a little messiness reads as natural.
Step 3 · Build the bud shape
Continue adding petals outward, gradually expanding the silhouette to create the rosebud. Each new petal should overlap the previous one and lean slightly outward as it goes.
By the end of this step the overall shape should already read as a rose — even though nothing's refined yet. If it doesn't, look at where your petals overlap; that's almost always where the shape gets read.
Step 4 · Add outer petals
Now draw larger, more open petals around the outside of the bud. These are the petals that have already begun to unfurl — they should look softer, slightly wavy, and a bit looser than the tight inner ones.
Two or three big outer petals are usually enough. More than that and the flower starts to look flat instead of three-dimensional.
Step 5 · Refine the shape
Go back over your petals and adjust the curves and overlaps. Make the shape feel more natural by varying petal sizes and edges — this is where your drawing stops looking stiff and starts feeling alive.
A good test: squint at the drawing. If every petal looks the same size, break the symmetry. Erase one or two edges and redraw them slightly larger or more curved.
Step 6 · Draw the stem
Add a stem extending downward from the flower. Two parallel curving lines do the job — keep them slightly off-vertical so the rose feels like it's been picked rather than drawn from a botany textbook.
You can also sketch the small base where the petals meet the stem (the calyx). A few short, jagged shapes are enough.
Step 7 · Add leaves
Draw a few leaves along the stem. Include jagged, serrated edges and a clear central vein for a more realistic look. Two or three leaves are plenty — overcrowding the composition is the most common reason a rose drawing starts to feel busy.
Place leaves on alternating sides of the stem, and angle them outward as if they were catching light from above.
Step 8 · Add shading
Use light shading or hatching to give your rose depth and volume. Focus on the areas where petals overlap — those shadows are what make the flower feel three-dimensional rather than flat.
Keep your pencil strokes following the curve of each petal. Cross-hatching works for the deepest shadows, single-direction hatching for the softer mid-tones. Leave the highlights as untouched paper.
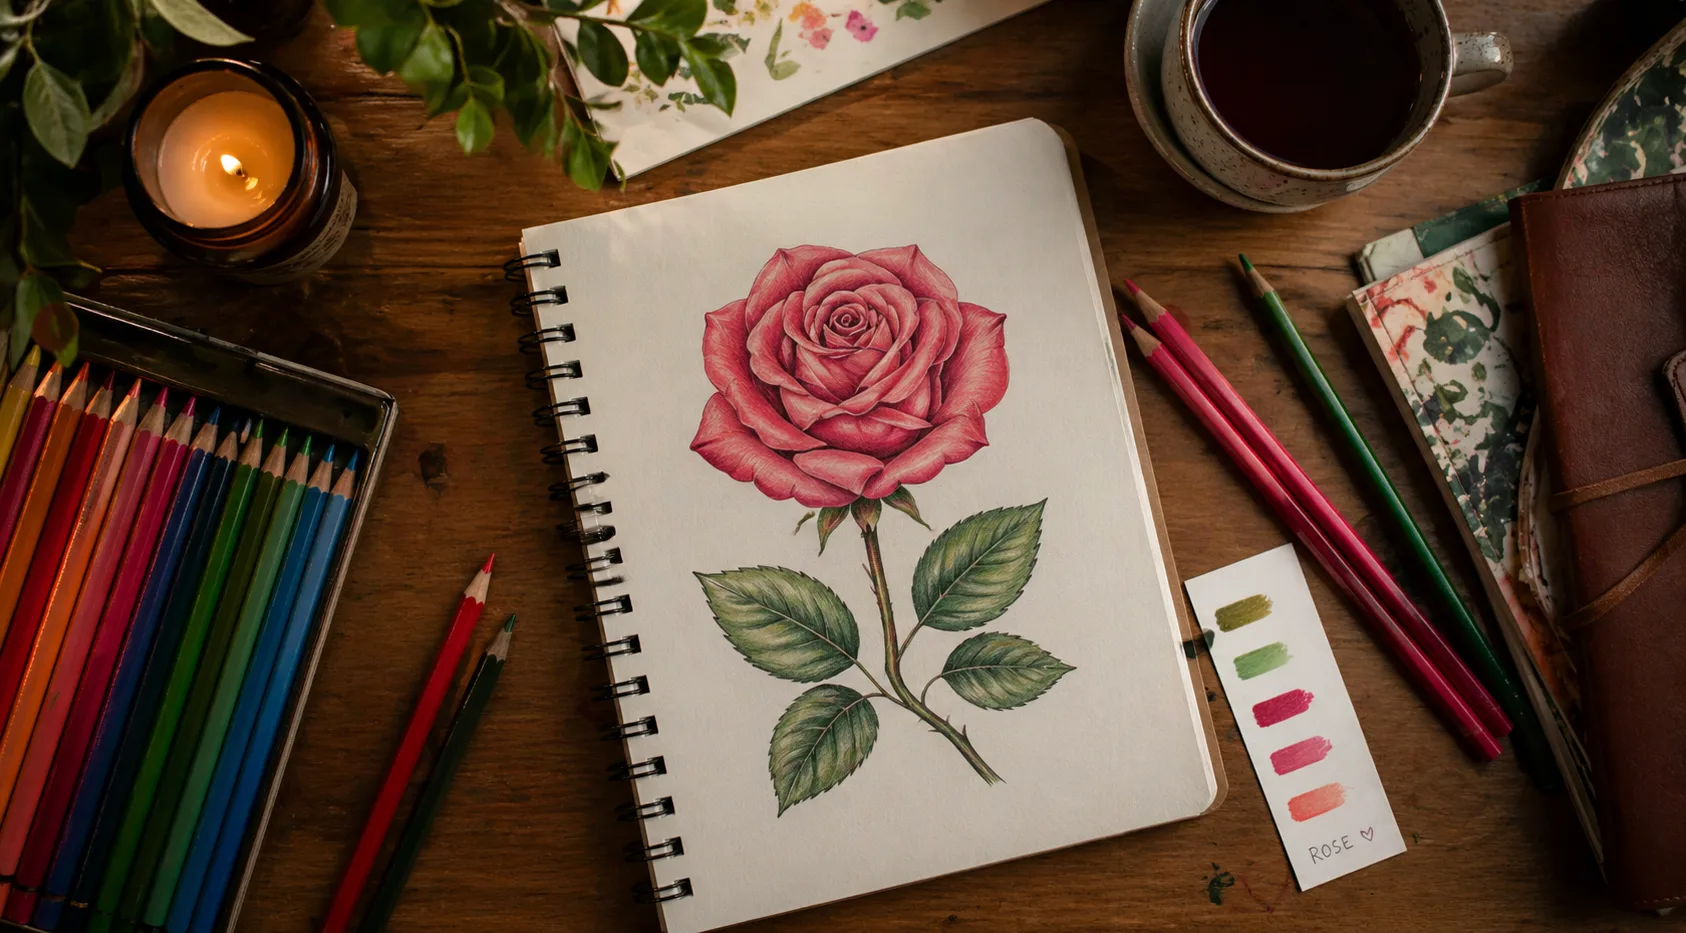
Step 9 · Color your rose
Finish by coloring your rose. Reds and pinks for the petals, greens for the leaves, and deeper tones in the shadow areas. Layer your color slowly — two light passes always look better than one heavy one.
Add a few highlights with a white pencil or by leaving the paper bare on the petal edges. Sign in the corner. You're done.
Tips for your next rose
- Draw it three times in a row. Your second rose will be better than the first; your third will be better than both. This composition is short enough to repeat in one sitting.
- Try different petal counts. A tight five-petal rosebud reads as young and closed. A loose, blown rose with seven or eight outer petals reads as mature and open.
- Change the angle. All the steps above show a 3/4 view. Try a side profile (more dramatic) or a top-down view (harder, but very satisfying when it works).
When you're ready to take it further, use ARTrace to project a real rose photograph onto your paper — and trace the parts that are still tricky. Tracing isn't cheating; it's how you teach your hand the shapes your eye already knows.
For another botanical drawing in the same naturalistic style, try the sunflower tutorial next — built outward from two simple circles instead of a spiral.