- Difficulty
- Beginner+
- ● ● ● ○ ○
- Time
- 40–55 min
- From blank page
- Steps
- 9
- Disc → full color
- Best for
- Ages 8+
- Kids & adults
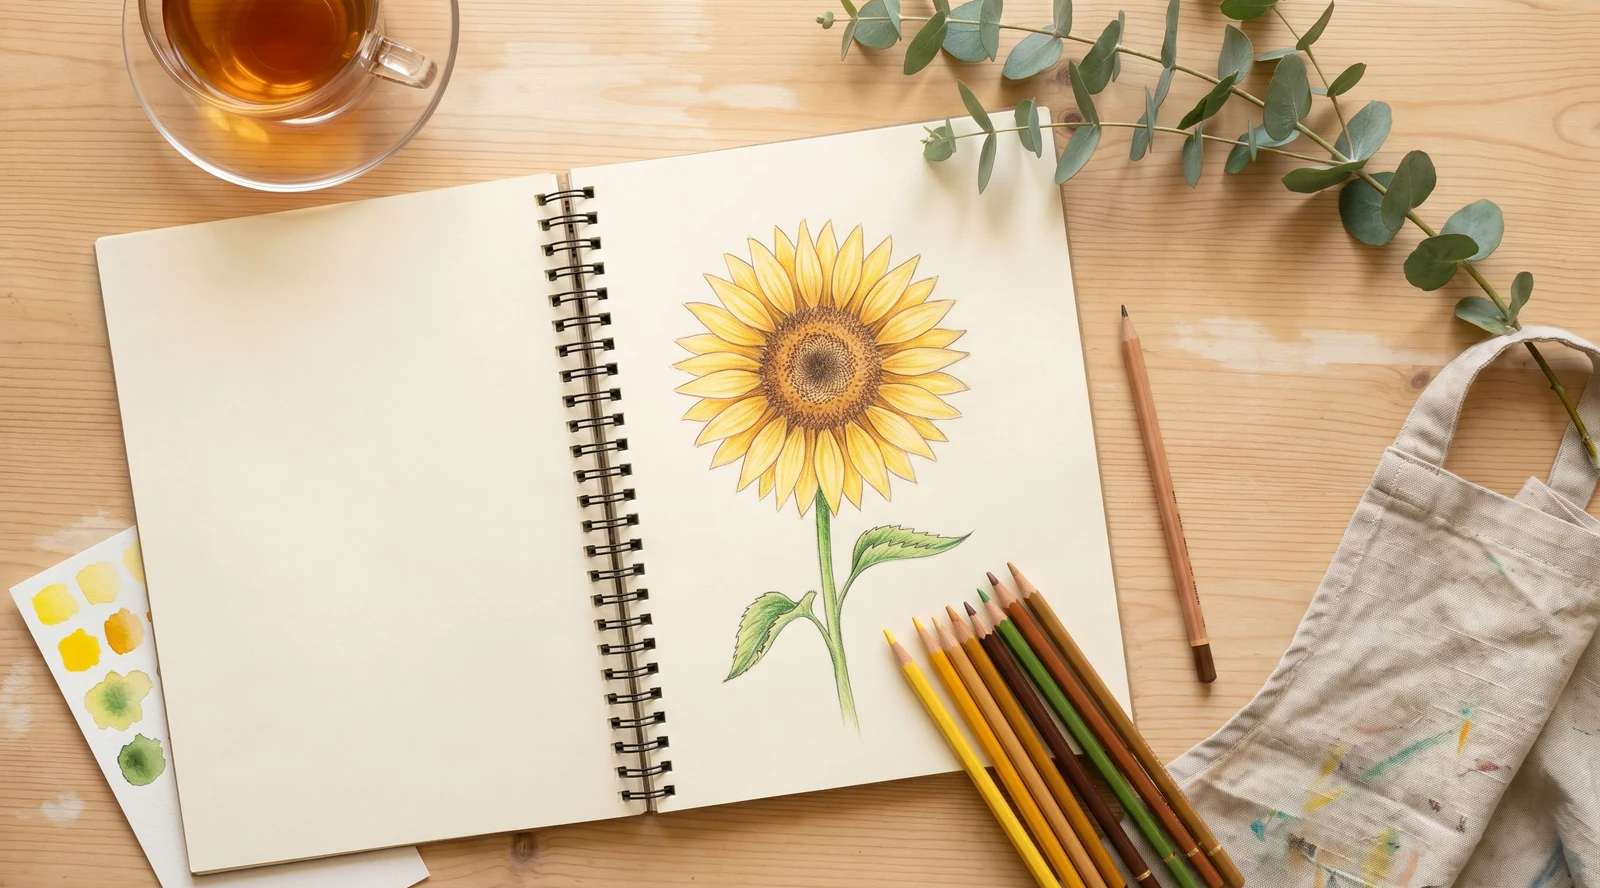
Grab these first
A pencil (HB or 2B), an eraser, plain paper, and colored pencils — sunny yellow, warm amber, rich brown, and at least two greens for the stem and leaves. Watercolor works just as well for the final step if you prefer washes to colored-pencil layers.
Want a perfectly proportioned sunflower on the first try? Open the sunflower template in ARTrace and project it onto your paper through the AR camera. You sketch with a real pencil; the reference floats above the page — the same trick botanical illustrators pulled with a 19th-century camera lucida, only without the brass armature. More to trace once you finish? Browse the full drawings-to-trace library for ideas.
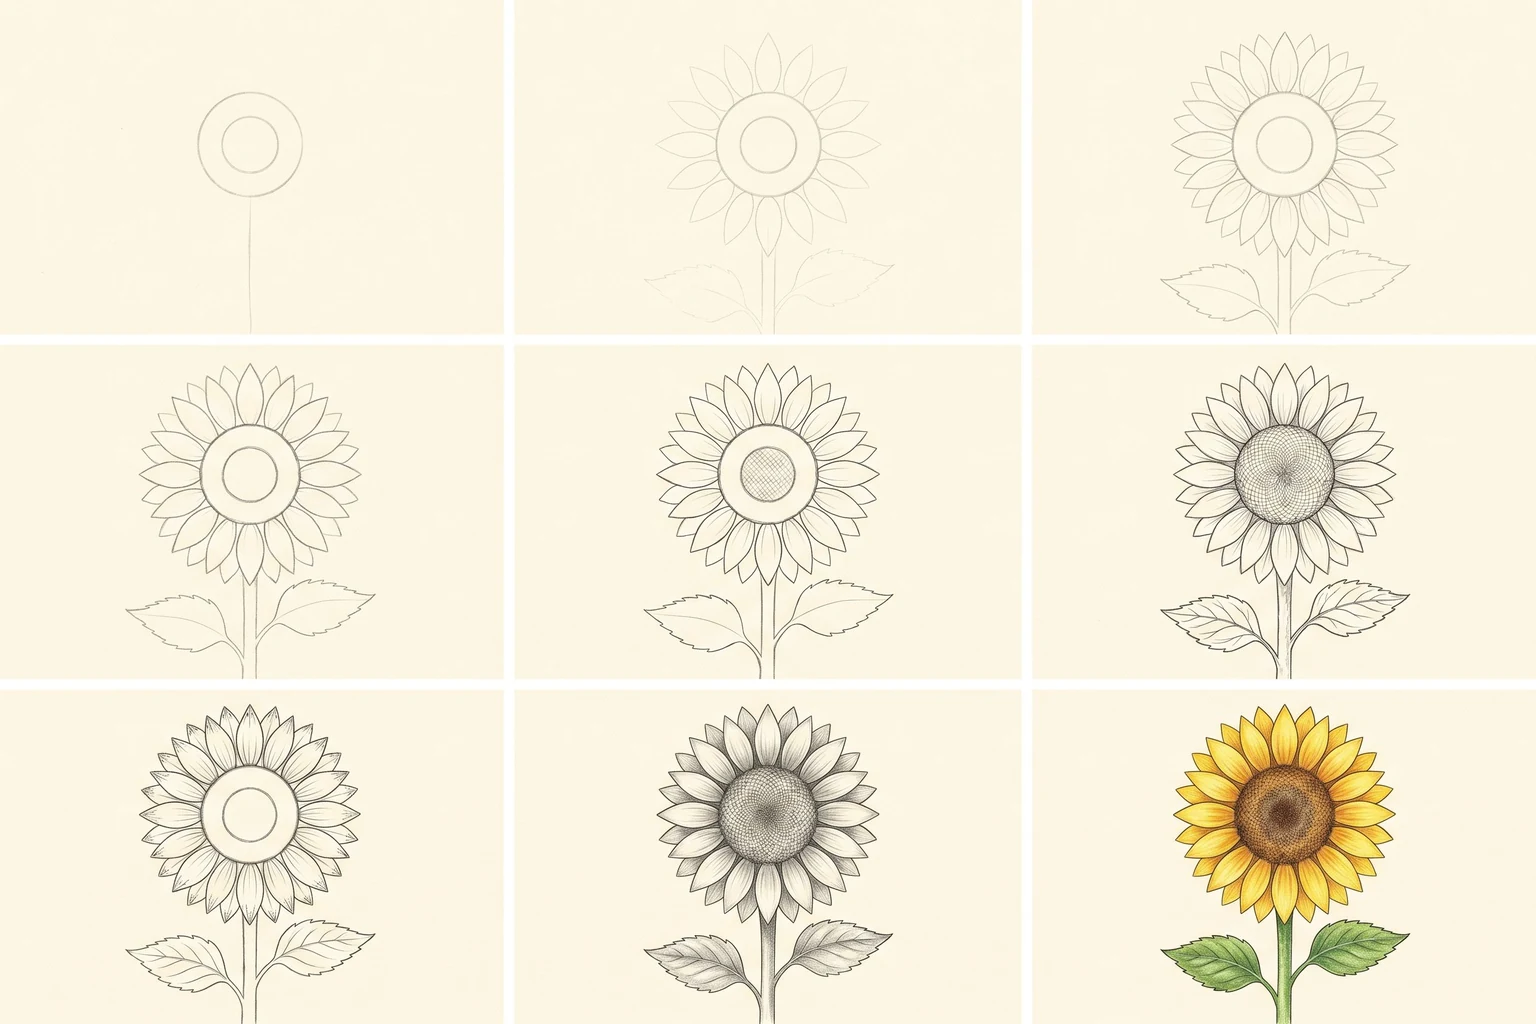
1. Center disc circles
Draw a small circle for the inner center of the sunflower, then a larger circle around it for the seed disc. Both should be faint — this is pure construction. Add a single barely-visible vertical line below the disc; that's the placeholder for the stem so your whole composition stays balanced on the page.
Press lightly. Everything that follows builds outward from these two simple circles, and you'll erase most of the construction later.
2. Inner ring of petals
Around the disc, sketch a faint ring of short pointed petals. Keep them roughly the same length and aim for about twelve evenly spaced petals to start with. Don't worry if your spacing is uneven — you'll refine the shapes later, and real sunflowers are full of tiny irregularities anyway.
3. Outer ring of ray petals
Behind and between the inner petals, draw a second ring of slightly longer pointed ray petals fanning out. Each outer petal should sit in the gap between two inner petals so the layers visibly stagger. Together the two rings give the sunflower its full, generous silhouette.
4. Clean petal outlines
Go back over all the petals with a slightly darker, more confident line. Add a gentle natural curve to each — a tiny twist near the tip, or a faint dip along one edge. Sunflowers are not perfectly symmetrical, and these tiny variations are what make the drawing feel alive rather than diagrammatic.
5. Seed texture on the disc
Inside the center disc, add a fine cross-hatched seed pattern — short diagonal strokes in two directions form the classic sunflower seed grid. Keep the strokes light; you'll deepen them with shading in step 8. The cross-hatch reads as "seeds" without you needing to draw every single one.
6. Stem and leaf outlines
Draw the stem as two parallel curving lines below the disc. Add two serrated leaf outlines on alternating sides of the stem, each with a soft pointed tip. Sunflower leaves are heart-shaped at the base and gently jagged along the edges — loose serrations, not crisp teeth.
7. Leaf veins and stem detail
Add a clear central vein down each leaf and a few branching side veins angling outward. A couple of short surface lines along the stem suggest its slight texture. Keep all of these light and confident — they're hints, not decoration, and they hold up better after the colored pencil layer goes on top.
8. Shading does the heavy lifting
Soft graphite shading on the disc center (deepest in the middle, fading outward), where petals overlap each other, along one side of the stem, and along the underside of each leaf. The shading is what gives the flower its depth before any color goes on — without it, the colored final step looks flat.
9. Sunny color — the final flourish
Bright sunny yellow across the ray petals, deepening to warm amber where each petal joins the disc. Rich warm brown on the disc itself, with a darker brown layered over the seed pattern. Fresh green on the stem and leaves, with a deeper green along the veins and shaded sides. Deepen the existing shadows a touch and sign your name.