- Difficulty
- Beginner
- ● ● ○ ○ ○
- Time
- 25–35 min
- From blank page
- Steps
- 9
- Circle → warm color
- Best for
- Ages 5+
- Kids & adults
Grab these first
A pencil (HB or 2B), an eraser, plain paper, and colored pencils — cream, soft pink, orange, a fresh green for the carrot top, and black for the eyes. A black fineliner is optional for the clean outline in step 5, but graphite alone works perfectly.
Want a perfectly proportioned bunny on the first try? Open the bunny template in ARTrace and project it onto your paper through the AR camera. Your hand does the drawing; your phone holds the shape in place — a modern camera lucida in your pocket. More to trace once you finish? Browse the full drawings-to-trace library for ideas.
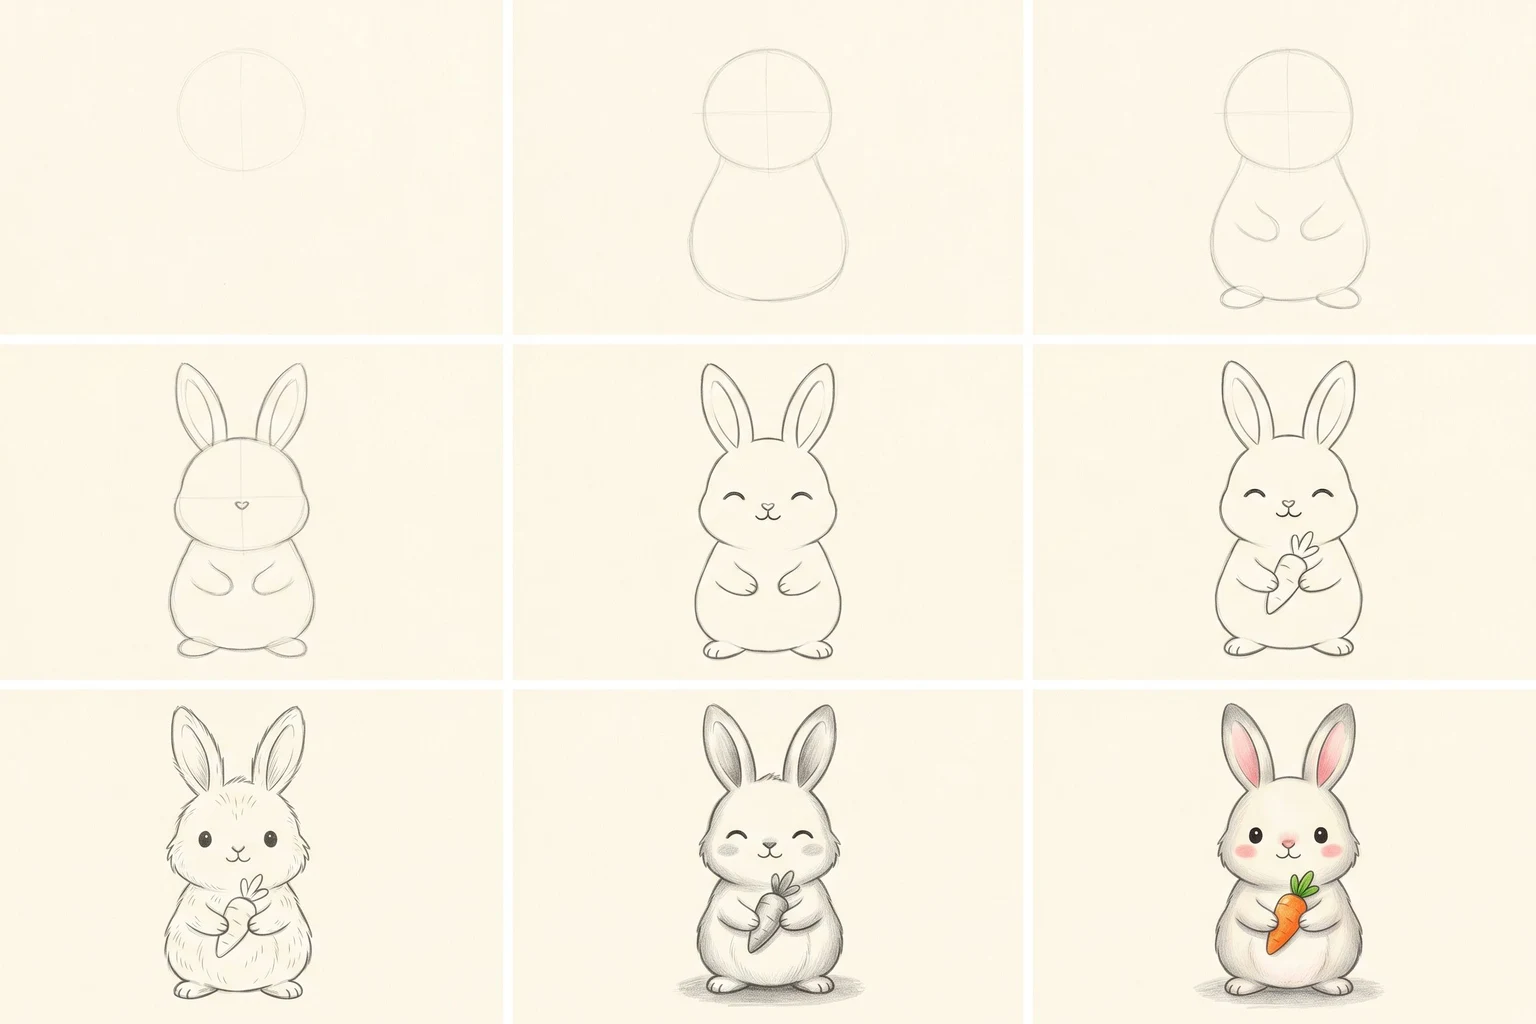
1. Round head circle
Start with a single soft circle in the upper half of your page. Don't aim for compass-perfect — a slightly squashed, hand-drawn circle reads more naturally and gives the bunny a friendly, hand-made feel. Keep the pencil genuinely faint; this is construction work and most of it will be erased later.
Leave room below the circle for the body, the feet, and a small carrot. A common mistake is to draw the head too large and run out of page; if anything, err on the small side.
2. Pear-shaped body
Right under the head, draw a soft pear shape — narrower at the shoulders, wider toward the bottom. Overlap the head slightly so the chin tucks into the chest. The body is about a third taller than the head; think "small egg on top of a bigger pear."
3. Stubby feet and paws
Two small oval feet peek out at the bottom, set close together — they should look like two soft jellybeans, not long rabbit hindlegs. Just above them, sketch two short forepaws folded against the chest, about where a carrot will soon sit. Keep everything compact and round; no long limbs anywhere.
4. Tall upright ears — instant bunny
Two long upright ears rise from the top of the head, tapering to soft rounded tips. Make them taller than the head itself — bunny ears are famously oversized, and short ears read as "kitten" or "mouse." Angle them ever so slightly outward, not perfectly parallel.
A tiny triangular nose sits low between the cheeks. That's all the face you need for now — eyes and smile come in step 5.
5. Closed-eye smile — and a clean outline
Two arched closed eyes set wide apart, like little upside-down U's or shallow C-curves. A tiny smile sits just under the nose, soft cheek curves on either side. The closed-eye expression is what makes the bunny look happy and relaxed rather than startled.
Now trace the whole silhouette with one confident pencil line and erase every construction stroke underneath. Suddenly the drawing tightens up and a real little character emerges.
6. A tiny carrot — the personality moment
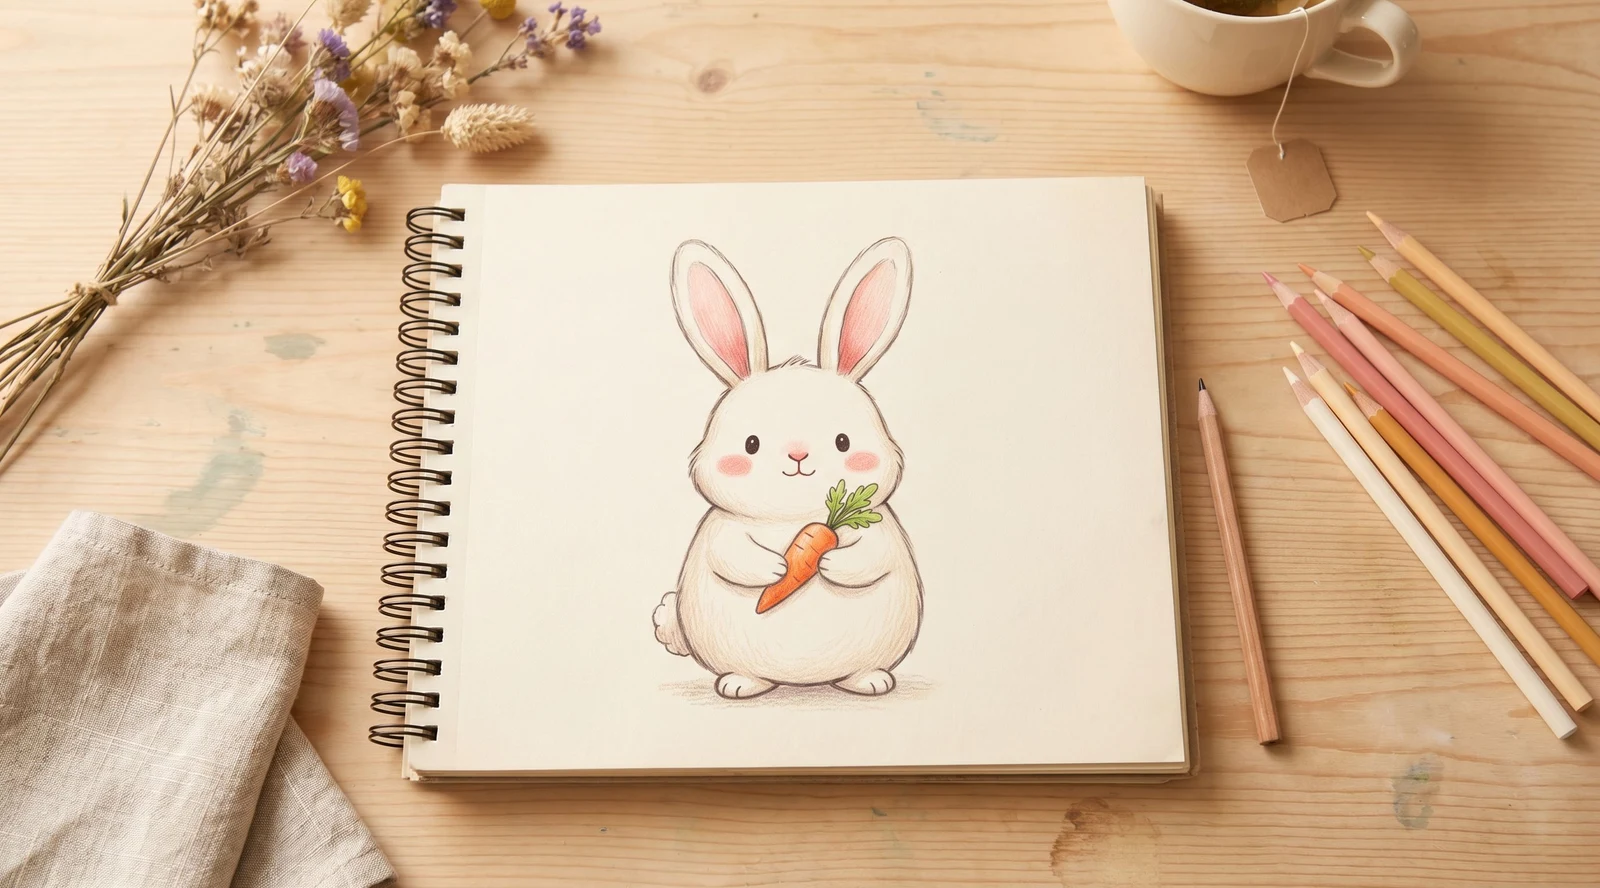
Tucked between the two forepaws, draw a small pointed carrot with a feathery green leafy top. The carrot should be roughly the height of the bunny's chest — not larger, or it overwhelms the figure. Two or three short dashes across the body of the carrot suggest the natural ridges.
This step is the personality moment. Without the carrot the bunny reads as generic; with it, the whole story snaps into place.
7. Hint at the fur
Short directional pencil strokes around the cheeks, chest and the tips of the ears suggest fluffy fur. A few stray tufts above the head add softness. The strokes follow the shape — curving outward from the body, upward from the head, downward from the cheeks. Less is more; you're suggesting fur, not drawing every hair.
8. Shadows do the heavy lifting
Soft graphite shading under the chin, along the sides of the body, beneath the paws and inside the ears. Then the single most important touch: a small oval shadow on the ground under the feet. The bunny stops floating; it starts standing.
9. Warm color — the final flourish
Cream-white fur with light grey shadows along the back. Soft pink inside each ear and on the tiny nose, rosy cheek blush right where you placed the cheek curves. Glossy black to fill in the dot eyes. Bright orange carrot with a feathery green leafy top — saturated and fresh, not muted. Deepen the existing graphite shadows a touch and sign your name in the corner.