- Difficulty
- Beginner
- ● ● ○ ○ ○
- Time
- 30–40 min
- From blank page
- Steps
- 9
- Circle → full color
- Best for
- Ages 6+
- Kids & adults
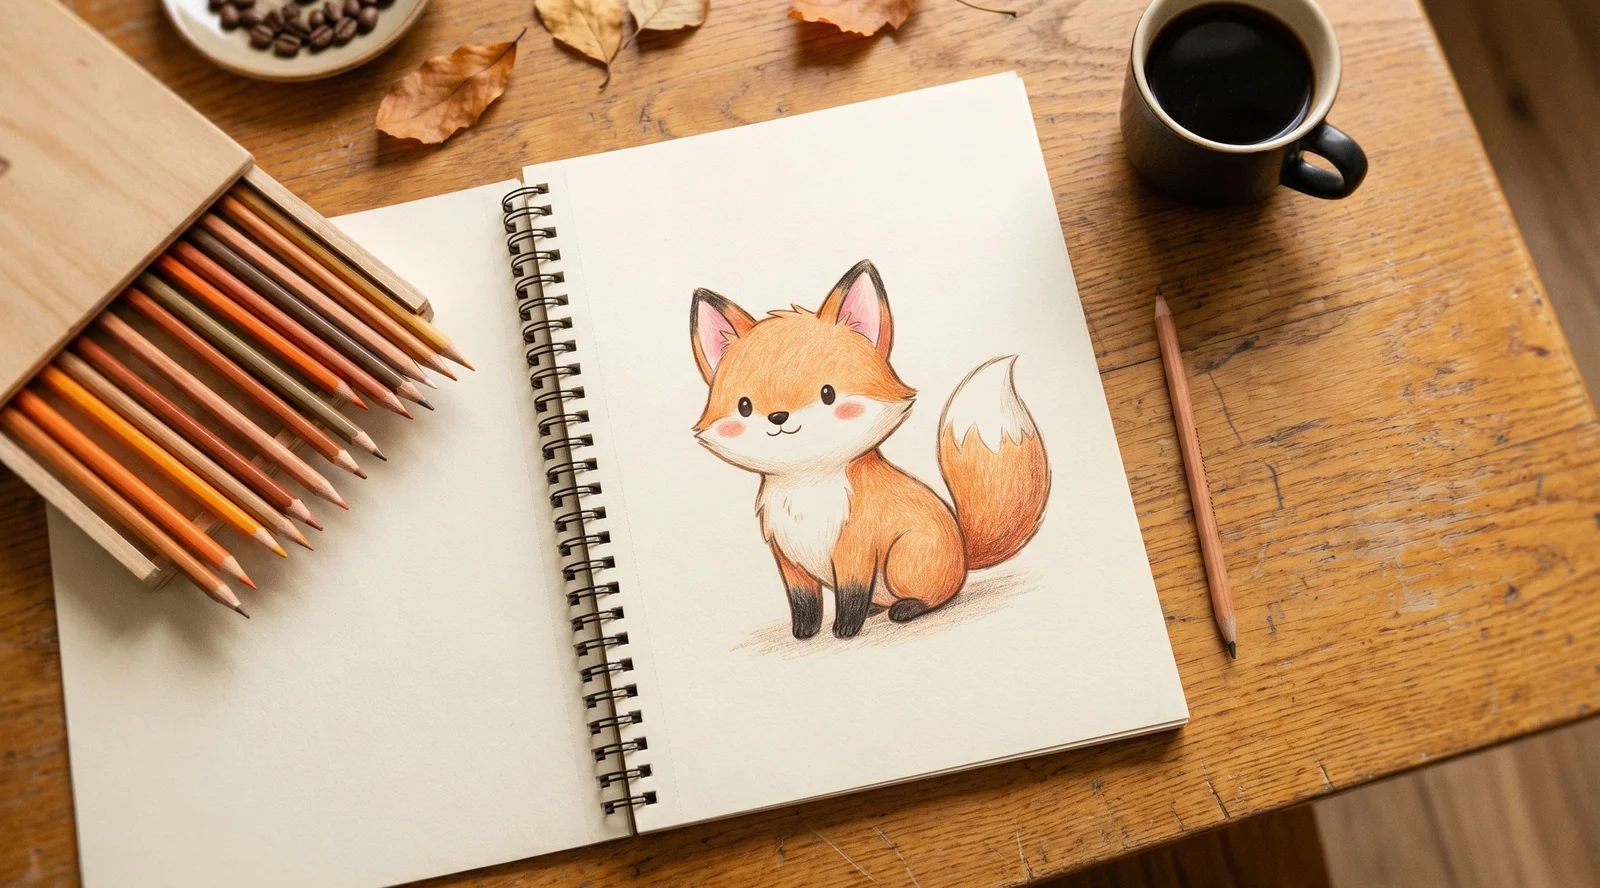
Grab these first
You need a pencil (HB or 2B), an eraser, plain paper, and colored pencils. A black fineliner is optional for the clean outline in step 5. For the final color in step 9, raid the warm half of your set — orange, rust, brown, a touch of cream, soft pink, and black.
Want a perfectly proportioned fox on the first try? Open a fox template in ARTrace and project it onto your paper through the AR camera — the app overlays the outline so you trace, not guess. It's a modern camera lucida that lives in your phone. More to trace once you finish? Browse the full drawings-to-trace library for ideas.
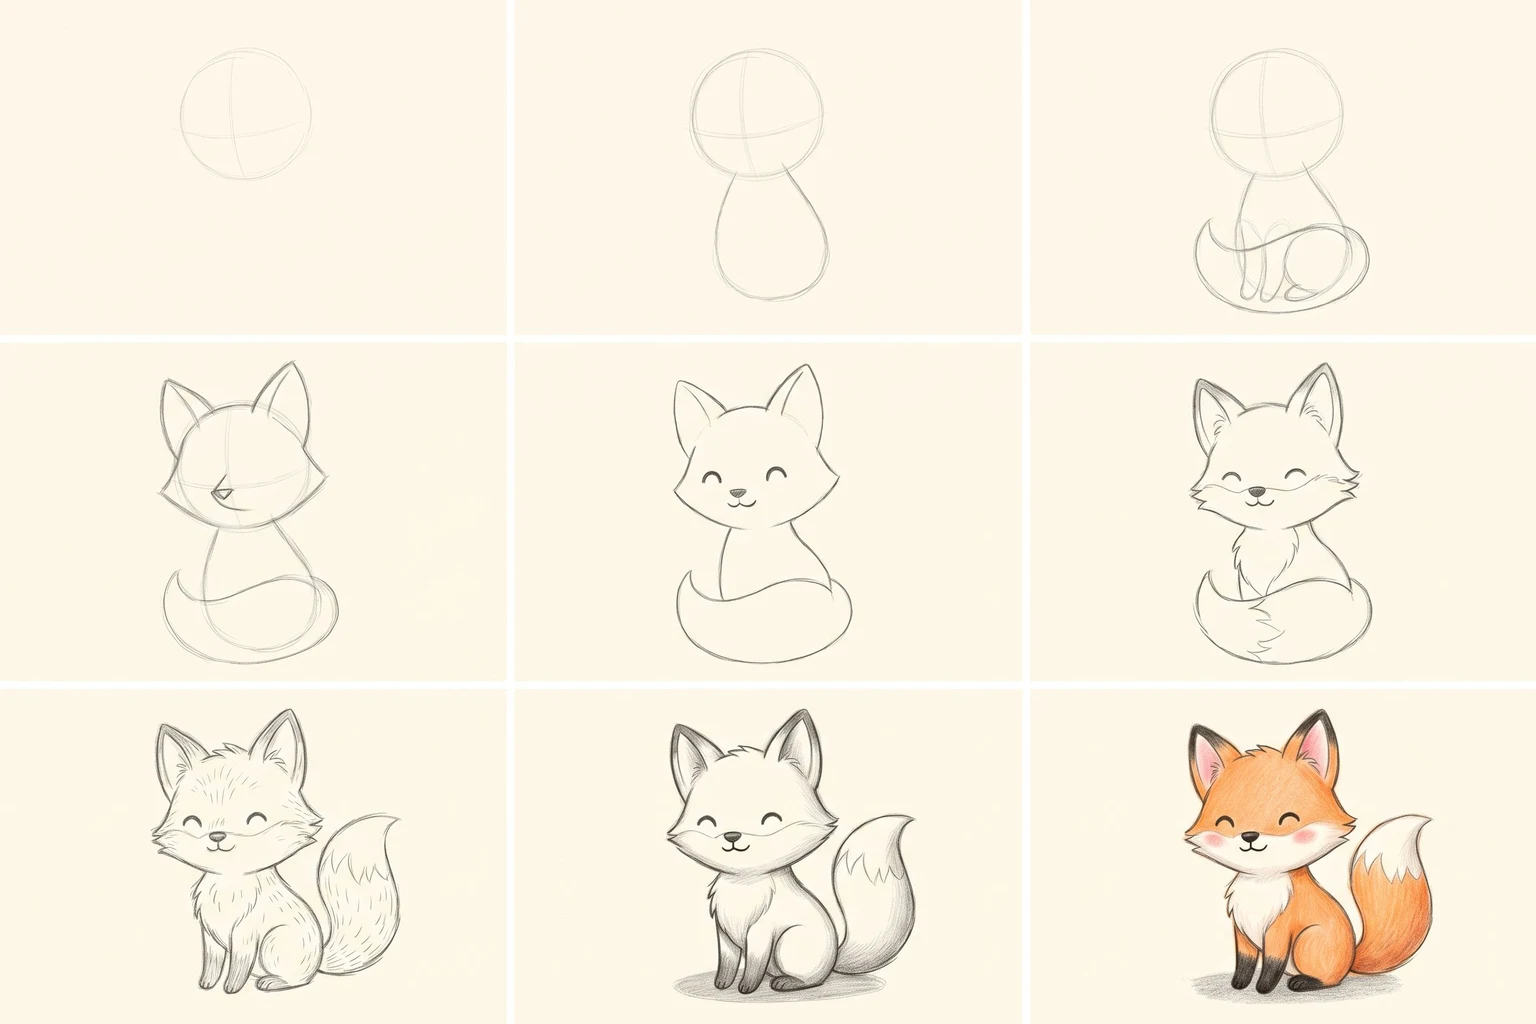
1. Round head circle
Draw a single faint circle in the upper-left third of the page. That's the head. Don't press hard — these first strokes are pure construction, you'll erase most of them later. If your circle is slightly egg-shaped, even better; foxes don't have perfect geometry.
Keep some empty space below the circle for the body and tail to come.
2. Teardrop body
Below and slightly overlapping the head, draw a wider teardrop or rounded triangle for the body. Imagine a fox sitting on its haunches — the broad part is the chest, the narrower point is where the tail tucks in.
The body should be about 1.5× the size of the head. If the proportions look off, no worry — fox cartoons are forgiving. As long as the head is on top and the body is wider at the chest, you're on track.
3. Curled tail and paws
Now the signature move — a fluffy tail that curls from the back of the body, sweeping around to the front and almost touching the chin. Foxes have huge tails relative to their bodies, so don't be shy. Two tiny round paws peek out from under the body, half-hidden by the tail's curve.
4. Pointy ears and snout
Two large triangular ears on top of the head, pointing up and very slightly forward. They should be tall — at least a third of the head's height. Then push a small sharp snout out from the lower front of the head. Think "ice-cream cone tipped sideways".
The ears and snout together are what separate a fox from a dog or cat. Keep them crisp and angular while the rest of the body stays round.
5. Bring the face to life
Time for the face. Add two closed-curve eyes — a smiling fox is the easiest fox to draw, and the cutest. A small curved mouth under the snout, a tiny black nose at the tip, and you've got a face. Now trace the entire silhouette in one confident line and erase every construction stroke underneath.
If a fineliner is handy, that's the moment to use it. Otherwise just darken the outline with your pencil.
6. Cheek tufts and white chest
Add two fluffy cheek tufts on either side of the face, just below the snout, and a soft V-shaped patch on the chest. These are the white markings every cartoon fox has. Leave them outlined for now — we'll keep them light when the color comes.
This is the personality moment. The cheek tufts make the fox look chubby and friendly instead of sharp and wild.
7. Hint at the fur
Short directional pencil strokes following the body's curve — down along the cheeks, across the back, around the curl of the tail. The trick is suggestion, not detail. Three or four strokes per area is plenty.
If you start counting strokes you're overdoing it. Squint at your drawing every few seconds and stop the moment the fur reads as fur.
8. Shadows
Soft graphite shading where the body folds: under the chin, beneath the belly, along the inner curve of the tail, between the legs. Then a small oval shadow under the paws — that's what anchors the fox to the page, instead of having it float.
Use the side of your pencil for the body shading and the tip for the ground shadow. Build up tone in layers, not a single dark pass.
9. Warm orange color
Layer warm orange across the body, with rust or deeper orange in the shadow areas you already shaded in step 8. Keep the cheek tufts, chest patch, and tail tip cream-white. Black for the paws and the very tips of the ears. Soft pink inside each ear. A tiny rosy blush on each cheek finishes the friendly look.
Build up the color in light layers — pressing hard locks in mistakes and kills the soft pencil texture you worked for in step 8.