- Difficulty
- Beginner
- ● ● ○ ○ ○
- Time
- 25–35 min
- From blank page
- Steps
- 9
- Circle → cherry red
- Best for
- Ages 5+
- Kids & adults
Grab these first
A pencil (HB or 2B), an eraser, plain paper, and colored pencils — cherry red, soft pink, a golden yellow for the nose, and black for the eyes. A black fineliner is optional for the clean outline in step 5, but graphite alone works perfectly.
Want a perfectly proportioned Hello Kitty on the first try? Open the Hello Kitty template in ARTrace and project it onto your paper through the AR camera. Your hand does the drawing; your phone holds the shape in place — a modern camera lucida in your pocket. More to trace once you finish? Browse the full drawings-to-trace library for ideas.
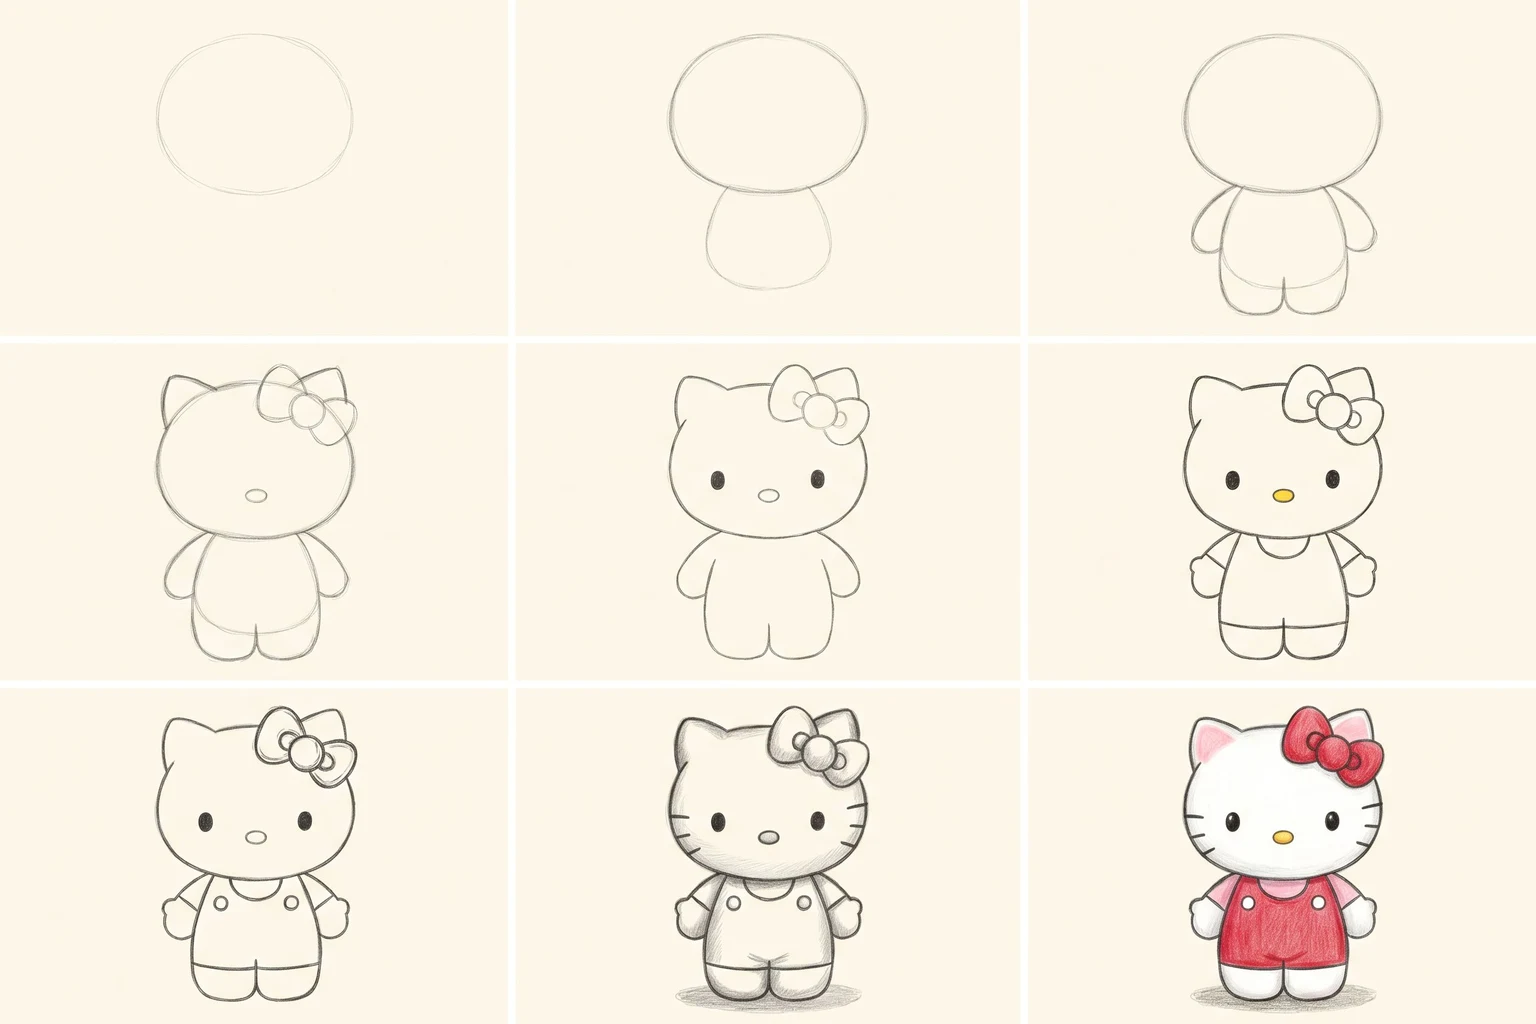
1. Round head circle
Start with a single soft circle in the upper half of your page. Make it generous — Hello Kitty's head is famously oversized compared to her body, almost a full half of her total height. A slightly egg-shaped circle reads better than a perfect compass circle, so don't fight your hand on the first stroke.
Keep the pencil genuinely faint. This is construction work and you'll erase most of it later. Leave room below the head for the body, the overalls, and the small feet.
2. Rounded body
Right under the head, tucked just behind the chin, draw a smaller rounded body — narrower at the shoulders, slightly wider at the bottom. Think of it as a small soft pear. The body is shorter than the head, not taller, so resist the urge to stretch it down the page.
3. Stubby arms and feet
Two short stubby arms come out from the sides of the body, slightly out at the sides — Hello Kitty almost always has her arms in a welcoming pose. Two small oval feet peek out at the very bottom, set close together. Everything stays compact and round; no long limbs, no elegant proportions.
4. Ears, nose, bow — instant Hello Kitty
Two small pointy triangular ears point up from the top of the head, angled slightly outward. A tiny oval nose sits dead-center low in the face. Then sketch the signature bow on her left ear — that's the right side from your viewer's perspective. The bow is roughly the same size as one ear.
5. Two dot eyes — and a clean outline
Two small round dot eyes set wide apart, sitting just above the nose. Keep them small and perfectly round — they're solid black, no whites, no highlights. No mouth.
Then trace your whole figure with one confident line and erase every construction stroke underneath. The drawing finally tightens up here, and the moment those two dots and the nose land in the right spots, she's immediately recognizable.
6. Simple overalls
Outline the classic overalls: two shoulder straps from the chest meeting at a horizontal waistline that sits across the middle of the body. The overalls cover the lower half down to where the feet peek out. The shirt underneath shows at the neck and across the short sleeves on each arm.
7. Bow detail and buttons
Add the bow ribbon detail — a small knot at the center, and a curving fold line on each loop to give it shape. A small button dot on each overall strap. Two or three short whisker dashes on each cheek complete the face.
8. Shadows do the heavy lifting
Soft graphite shading under the chin, along the sides of the body, under the arms, beneath the overall waistline, and inside the ears. Then the single most important touch: a clear oval shadow on the ground under the feet. She stops floating. She starts standing.
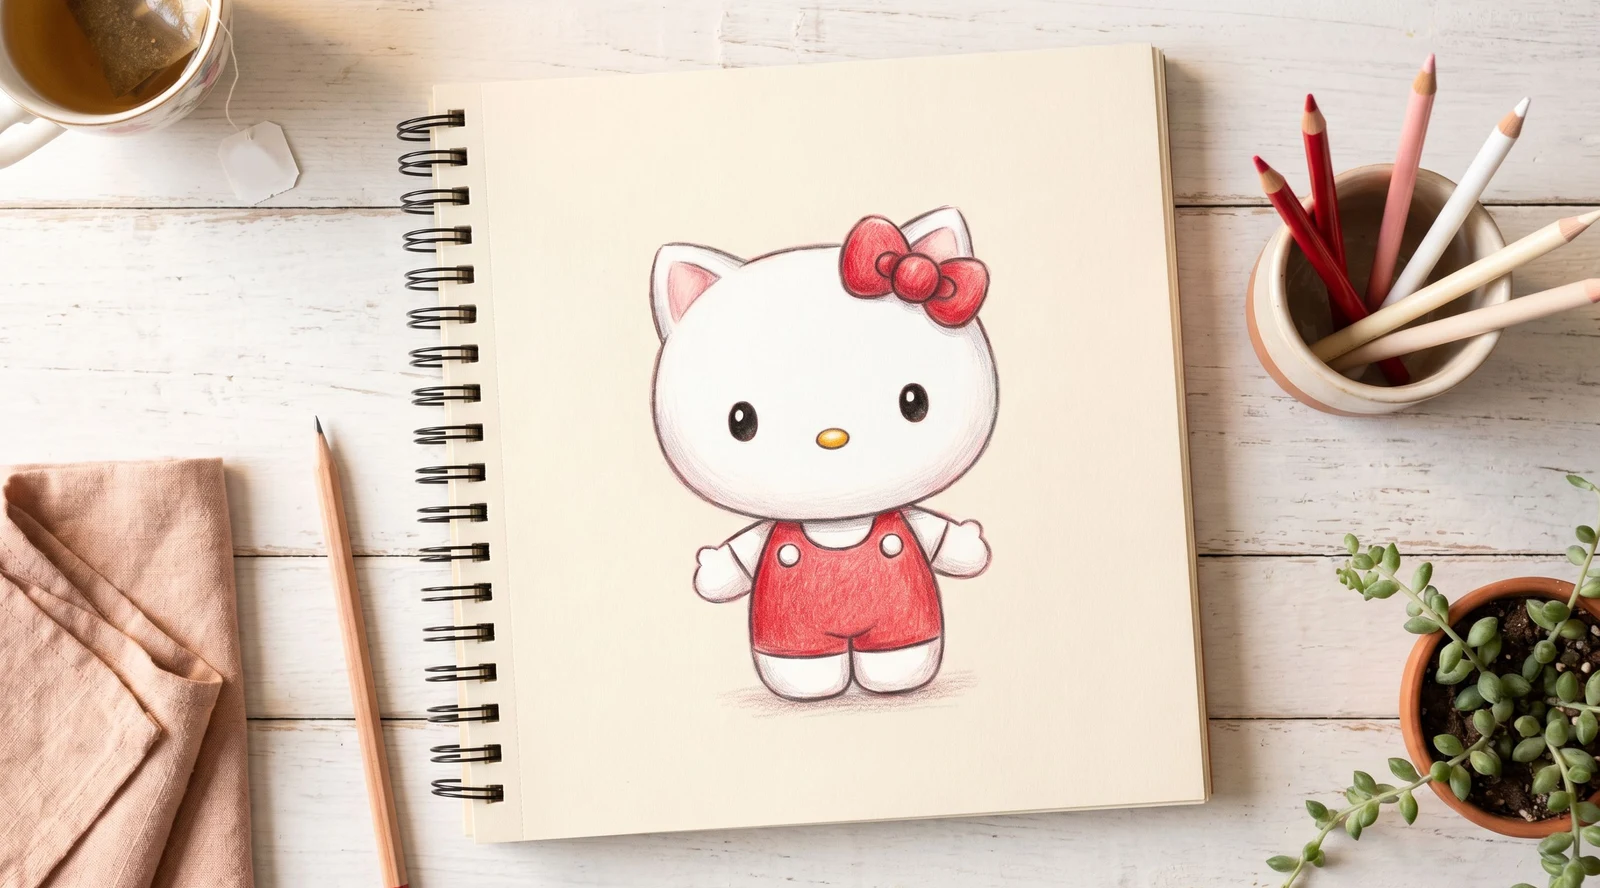
9. Cherry-red color — the final flourish
Leave the fur and face pure white. Cherry-red for the bow and the overall shorts — saturated and bright, not muted. Golden-yellow for the tiny oval nose. Soft pink inside each ear. Glossy black to fill in the two dot eyes. Deepen the existing shadows a touch and sign your name in the corner.